


Fall lawn & garden maintenance: A how-to guide from a professional Landscape Designer
It's that time of year again! The flowers are fading, and the leaves, although beautiful, subtly remind us that winter is coming. Our yards are no longer looking their best. It easy to leave your garden and lawn as is going into the winter, but for best results year round (here's looking at you summer 2021!), follow this handy little guide. I've linked all of my tools and supplies for your convenience!

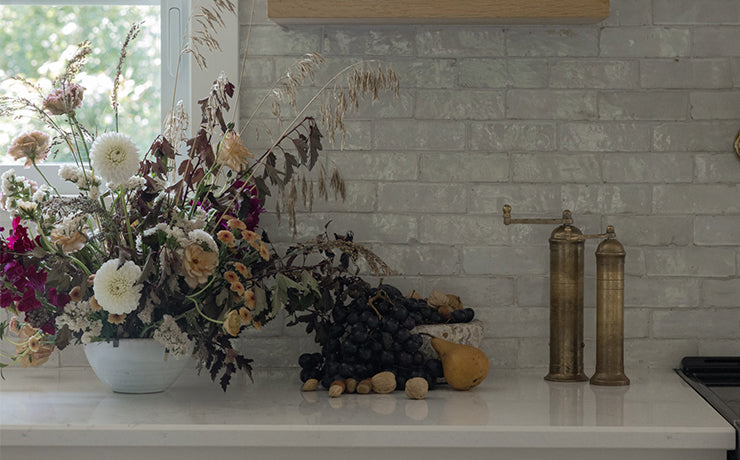
Above: Echinacea surrounded by Tufted Hair Grass (Deschampsia cespitosa)
I studied Landscape Design for 3 years in London before getting into Residential and Urban Design for 7 years. I worked on many high-end residential properties, city parks, Federal (Canadian) land, and plenty of urban public spaces. The importance of pointing out the perspective for this guide is that my goal is to not only prep your garden for a healthy dormant season and spring next year, but to keep its bones looking great even on the coldest and most nasty winter days.
I'll touch on form maintenance and how to keep things pretty for the snow-less fall and spring days, what you should be doing for your lawn, and how to perform fall pruning in your garden. A popular misconception about fall maintenance is "cut everything down, remove all the leaves, stop giving the grass attention as it goes dormant". Each one of these ideas are wrong in their own way. As a designer, I strive to first and foremost give a landscape plan good "bones" or structure for this very reason. Using the elements and principles of design I incorporate balance, shape, line, repetition, etc. These are the elements that shine through the most in the winter when the trees and ground are bare, so we need to pay special attention in the fall to creating a garden that remains beautiful through the winter. I do my best to accentuate these elements with my fall routine. Let's get into it.

Above: Front - Panicum virgatum 'Heavy Metal', Back - Anemone 'Honorine Jobert'
First, garden maintenance:
Edging
This is where I start - I take a steel straight edge shovel to the edges of my garden beds. If you want to really set your garden apart and you have straight lines, don't even try this without running a string line! A garden of curves is much more forgiving. Use the straight-edge shovel or a garden edger along the edge of your driveway, sidewalk, and curb line to achieve a clean look. Remember, this is the bones and shape of the garden that you will be looking at for the next 6 months!

Above: Catmint (Nepeta x faassenii 'Walkers Low') trails over precast retaining wall
Mulching
Unless I can see bare soil by the end of the summer, I wait to apply a fresh layer of mulch until the following spring. There are still seeds from weeds blowing late into the fall, so having your soil covered is crucial. If you have plants that are sensitive to the cold, consider bunching up mulch around the roots to help insulate them from frost. Try to keep the mulch from touching the plant itself as this can lead to rot in the spring.
Leaf Disposal
I only do a quick raking of the gardens in the fall. The remainder of the leaves I allow to sit around the base of the plants and perform the same function as my comment about the mulch above. Even for plants that are quite hardy, I'm willing to let those leaves sit over the winter as some extra protection(Astilbe's do quite well with this technique!). Again, perhaps even more important than the mulch, I do not push the leaves up against the plant! They are intended to cover the soil where the roots are, not the plant itself. Having leaves and mulch against the plant through the winter and early spring could lead to rot and other diseases.

Above: Anemone 'Honorine Jobert' blooms into mid-October with plenty of life left to make it until November (zone 5a)
Cutting Down Perennials (Don't!)
Wait! Stop! Before you cut down those perennials, consider the following; We have Echinacea, Astilbes, Hydrangea's, Catmint, and a few ornamental grasses in our Maison Blonde front yard. With the exception of the Catmint, I do not cut these down. I enjoy seeing the snow covered seed heads of the Echinacea, the dry flower panicles of the Hydrangea now brown and contrasting against their snow white background, as well as the the tall leaves and seeds of the ornamental grasses blowing in the wind. It's a winter meadow out there, and it's beautiful to look at on a snowy day! Bushier perennials like Catmint, Geranium, and other low spreaders are exempt from this as the first snow tends to crush them. On a warmer April day after the snow has melted, feel free to go out and cut them down to the ground before any new growth begins. 
Above: Echinacea surrounded by Tufted Hair Grass (Deschampsia cespitosa)
Deciduous Shrub Care
This is something that is unique to each species, but for the most part, deciduous shrubs can be pruned back strategically to a 1/2" above a node (where a leaf or bud comes out of a stem). If you want to maintain a tight and smaller shape shrub next year, continue down the stem a little further to a lower node. With this said, I highly recommend a quick Google search on that specific plant's maintenance just to confirm that a fall pruning is best. Some shrubs may not warrant pruning at all.

Above: The dried flower heads of Panicle Hydrangea will provide plenty of winter interest.
Evergreen Shrub Care
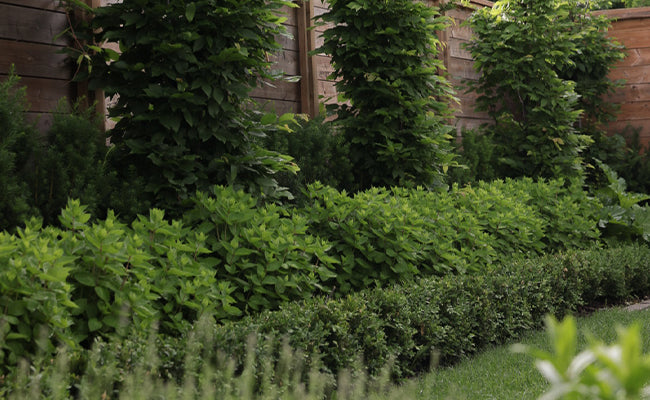
Some evergreen’s require protection from either cold brittle winds, or heavy snow and ice. Cedar trees are the first that come to mind - for a young tree with a relatively loose form, the snow will often pile up and bend the branches back, exposing the central stem to the elements. Wrapping them in burlap tied with zip-ties will keep them slightly warmer as well as prevent snow damage. Pines are also a shrub that can require protection. The long needles with delicate attachments to the branches don't do very well in exposed and windy locations. Some protection will benefit these shrubs by means of burlap wrapped around a temporary wooden frame, or, other wind resistant plants being planted as a shield (this is why you need an actual Landscape Designer for your exterior!)

Above: A poured-in-place concrete border separates the gardens from the pea-stone lounge area. Catmint above Thyme.
Next up, your lawn:
If you know me personally, you know this is MY jam. Like, it's a bit of an obsession. This is what I do when I get home from work and I'm stressed; I cut the grass, often 3-4 times per week (yes, it's okay and even healthy!), run the trimmer, and browse for weeds and bare patches. I thoroughly enjoy the rewards it gives you after a lot of hard work and patience.

Above: This lawn mower is a budget mower that does a great job!
Fall is one of the best times to give your lawn a leg up for a green summer next year! It's actually the best time of the year to over-seed and lay sod! In the north our lawn seed mixes are made up of 'Cool-season' grasses. This means that they do the majority of their growing in the spring and the fall, and they go dormant in the summer. If you've seen a lawn go crisp brown during the summer, it's not dead, it's only in "hibernation" mode and will come back in the fall.
Cut it Short and Rake
Start by cutting your grass down to 1 1/2" in height. It's likely been kept at 2 1/2"-3" all summer, so consider lowering your mower to 2", and then a couple days later 1 1/2" so you don't shock it. You should never take off more than 1/3 of the height in one cutting. Take a leaf rake (ideally one of the abrasive old steel ones!) and aggressively loosen and remove the thatch build up. Thatch is the dead trimmings that settle down to the dirt between the grass blades. Some of this is good for your lawn, but often it ends up being too much by the end of the season and blocks nutrients and oxygen from reaching the soil. This raking action will also loosen the surface of the soil and create room for the next steps.

Above: The standard mower has 5 height levels. I cut at level 4 in the spring & fall, 5 in the summer, and just before seeding in the fall, 3.
Aerating (optional)
If you haven't done this for a few years and your lawn gets a lot of traffic, consider renting an aerator from Home Depot or have it done by a professional. This step loosens compacted soil allowing air and nutrients to get to the roots. It will leave unsightly little plugs of dirt sitting on the surface of the grass, but over time and with a few rain showers these will decompose back down to the soil.
Top Dress and Roll
Our lawn at Maison Blonde is only a year old so this step isn't necessary, but it is for most mature lawns. Top dressing is the process of raking fresh topsoil (bonus points if it has compost/manure!) over your lawn. This helps level out low spots that have developed, as well as provides loose nutrient dense soil for the existing grass and new seed to take advantage of. While rolling right after top dressing is a debate among Landscape Professionals, I prefer to rake it all out, roll it which exposes any high points or settled topsoil, and rake it smooth and loose again after.
Apply a Fall Fertilizer
This is an often over-looked step in the fall routine. Fertilizer is only for the spring and summer, right? False and false. Spring is the time to spread a balanced fertilizer that we will touch on in another blog post. You should not apply any high concentrate fertilizer in the summer at all as your grass is dormant during the summer heat and this will lead to burning out the grass. In the fall, you can apply a fall fertilizer to help over-winter your lawn and help it green up early in the spring. This step can be performed any time in September/October.

Above: Scotts Wizz Broadcast Spreader
Over-seed
This is perhaps the easiest and most enjoyable part of the process. I use a small hand-held spreader pictured above and it's amazing! I was skeptical when I first found it, but for $30, it's a great little tool and its batteries last a couple of years. All you have to do is fill the spreader with seed and adjust the output to the recommended amount on the bag. If you have a large lawn, a walk-behind spreader is more efficient. Try to do this on a calm day so the seed doesn't get blown around. You want as even as possible distribution. I will often double what the manufacturer recommends for a simple reason - I want the thickest lawn possible. After spreading, lightly rake over the lawn to shuffle the seed down to the soil. Water briefly every other day in cool weather, every day in hot weather.
Grass Types
Most garden centers sell grass seeds that are specific to the climate they're being sold in so you can't really go wrong. My favourite type is Kentucky Blue Grass, but it's important to have some variety like Perennial Rye Grass and Creeping Fescue. This variety allows you to have a lawn that can withstand a wider variety of elements. For example, Kentucky Blue Grass won't like the shade, Fescue doesn't like heat/humidity but will excel in cooler temperatures, and Rye Grass will come through in the shade where Kentucky Blue won't. It's hard to go wrong with any mix from a local garden center, but the Sun or Shade label on the bag is a good indicator of the mix proportions.
The Final Cut
Late in the fall, potentially even after the first snow fall has melted and we have the odd sweater-weather day in November, I like to do one final cut to even out the height of the existing grass as well as the new seed. This helps keep things tidy for the snow-less months of the winter. I also run the trimmer along all of the edges where the lawn meets a hard surface to give a nice clean line. The grass is no longer growing so this is the look you will hang on to for the next 6 months! I can't stress this enough as I believe it's one of the most important aesthetic steps you can take before winter. When the snow melts next spring, you want to see a tidy and clean yard!

I hope that this guide will be helpful to you in your fall routine. There are still a few warm days ahead so take advantage of them, enjoy the process while you soak up some vitamin-D! Lawn & garden care doesn't have to be a chore if you look at it from an input-output perspective. If you put the proper TLC into your property, it will pay you back next summer as it thrives!

Above: Munstead Lavender ('Lavandula angustifolia 'Munstead'), Thyme
Enjoy, and as always, let us know in the comments if you have any questions! Also, feel free to hit us up on Instagram at @maison.blonde for more inspo, ideas, and tips! We're always happy to help!


4 comments
Your blog caught my attention. The information about Grass types and lawn mower. Was very informative for me. If you would like to present the Lawn Mower vs Weed Eater in a brief manner please add this to your content or comments section at https://greenryenthusiast.com/
Jhon Alex
I’m glad that you mentioned how edging your garden beds, driveway, and sidewalks will give your curb a more appealing and cleaner look. It’s almost fall, so I wanted to get some landscaping done to match the change of season. I’ll have to call a landscape company to do some edging this weekend to improve the shape of my curb line. https://metrocurbappeal.com
Anna Collins
Very informative!! Thanks for all the tips!
Yvonne
Loved this article! Thanks for sharing all of your great tips!
Amanda
Leave a comment
This site is protected by hCaptcha and the hCaptcha Privacy Policy and Terms of Service apply.