Our DIY Kitchen Island Build
The kitchen is the heart of our home - we love to host, so it was really important that we give the space some extra attention. We originally solicited pricing from contractors for the build but after we did the math, it just didn't fit our budget. That's when we decided to take a go at it ourselves!
It all began with Nicole drafting up our floor plan (a whole other blog post on that coming). She massaged the layout to work just perfect in our small and slightly awkwardly laid out existing kitchen. Then I came along and put things into Google Sketchup with her oversight. I love cabinetry and millwork design and she has a great eye for style so we make a good team on this front!
Here's the initial concept;


What isn't shown in the middle is the counter overhang on the back side where the seating is, originally planned to be supported by a post at each end. We scrapped that idea and favour of extending the sides out - more on that later.
The first step was getting the shop ready. Here's what I needed for tools to get going;
- Table Saw
- Mitre Saw
- Planer
- Jointer
- Drill
- Biscuit Joiner
- Kreg Pocket Hole Jig
- Kreg Face Clamp
- Router table
- Orbital sander with grits ranging from 80 to 220
- Wagner Spray-tech Control Sprayer
Then there's the hefty materials list;
- 4'x8' Sheets of Baltic Birch Plywood
- Rough boards of poplar for the trim and face frames
- 1/4" Plywood (MDF ideally, hindsight is 20/20!) for the door inserts
- Kreg Screws for pocket holes
- Titebond III Glue
- 4/4 maple for the drawer boxes (means four quarters {~one inch thick!})
- Shellac for drawer box and cabinet interiors
- Hinges
- Drawer slides
- Drawer pulls and knobs
- Shims
Last but not least - a lot of patience.
Construction began with me marking out all of the cuts on each sheet of plywood. Then I began running them through the table saw and cutting them each to size. Below is a photo of the front half of the island prepped and ready for pre-drilling. 
I used my Kreg Pocket Hole Jig to expedite things and make it as solid as possible. Some carpenters use dado joints for cabinets, but for times sake I chose pocket holes and lots of glue.

Below - cross members pocket holed and ready for assembly.
I was fortunate enough to get my hands on some clamps at an amazing price last year and they're the most important part here. They allow me to put things in place, put a firm grip on them with the clamp and perfect them, then tighten it all the way before screwing the pieces together.

I've set up a workshop in our basement so I have to be cognizant of the size of the furniture compared to the size of the hallway to get it out of the basement! This meant I had to assemble each box individually and then fasten them together upstairs. This actually worked out very well!

I did my best to protect the interiors of the boxes from scuffs and glue because later on we'll be rubbing them down with shellac and they'll be visible with the doors open. Also, we love that baltic birch grain!

You can see the in bottom of the photo above that I used blocking to give further support to the cabinet floors. It's 3/4" plywood and therefore very strong, but often the weakest point of a build is the joints! Not here - both Nicole and I stood where the sink will go without any sag!
Next up was the back side of the island were the seating will be. It was the exact same process but with bigger boxes!
It was at this point that we opted to extend the sides out under the overhang. The channel on each side is for the electrical outlets on each side of the island.

We have just under five and a half feet of space between the support extensions which gives us enough room for 3 stools. Our space is limited so we couldn't go much bigger than absolutely necessary!
Now it was time to change gears - on to the face framing and trim work! I switched the miter saw blade over to this 80 tooth blade by Concord for cleaner end cuts on the soft poplar.
This is where I come in with the design - half of the accounts I follow on Instagram are millwork companies. I love British millwork design. Therefore, we wanted to adopt a little bit of it in our design (and add days of work!)
Here's the concept piece I glued up for Nicole's approval - it's called a 'beaded face frame';

I used the router table and my 1/4 bead bit to mill hundreds of feet of bead to be cut on the miter saw to size, and fastened with plenty of glue and 3/4" 18 gauge brad nails.
Then, using pocket holes on the backside of the face frames, I cut and fastened them all together, applied the beads, and clamped them in place to ensure it was what we wanted (and maybe to impress my fiance, a little haha)
Then I repeated the exact same process on the front of the cabinet. Throughout this entire kitchen build, we consulted each other on ideas and proportions. The drawer sizes and spacing were drafted in SketchUp, but once I had the cross members cut I tacked them in place and we decided to move things a little bit. Sometimes they moved an inch, other times 1/4 inch to be just perfect!

The details really do make the design. Something as small and unique like this bead sets it apart from a normal flush face cabinet!

Originally we were going to do a shaker style panel on the sides, but then I held up a piece of poplar to it and fell in love. That's the best part about DIY - you get to change your mind as you go haha!

So I proceeded to use my biscuit joiner on the remaining poplar boards, glued, and clamped them up over night.
Here they are going in. I applied plenty of glue to the backside and spread it around with a rubber glue brush, then used 1 3/8" 18 gauge nails to tack in place to dry. With the PSI cranked up on the compressor, the nails actually sink into the poplar about 1/8 and it almost "heals" around it! I did use wood-filler and after sanding and paint, they're completely invisible!
Now that the trimming is all done we're ready to start building doors! To be honest, doors aren't my strong point. I don't enjoy building them because they're so tedious and perhaps that's why I don't excel at them. I did my best though and they turned out decent!
Here's the 1 3/4" rails and stiles milled, routered, and ready to be joined.

After sanding them down with a 120 grit foam sanding block, I clamped them together with the 1/4" plywood panel. This is where I'd highly recommend going with MDF inserts instead of birch plywood. The "furs" in birch stand up when it gets wet from primer and the corners make it very difficult to sand!

I always get really excited to see the end product so I placed the drawer fronts in the openings just to see!
Time for primer!! After hours of sanding with the orbital sander and touching up the beads and trim with a foam block sander, we masked off the room and interior of the cabinets for primer. The Wagner Spray-tech Control Sprayer worked amazing for this. A nice consistent thin first coat to start.

So happy the grain shows through!!
We did 2 coats; the first coat was thin, which we then sanded with 120 grit, and then added on a thick coat afterwards and sanded with 150 before painting.
I added a 3/4" piece of pine to the lower perimeter to support the custom floor trim that we were pre-painting downstairs.

Here's the 4 3/4" tall custom (simple and affordable!) trim as well as a little peak at the other cabinets that were put together after the island. More on those later!

I set up a little paint booth in an unfinished corner of our basement to paint the doors and other little pieces. It's nothing fancy but again, this is a DIY kitchen on a budget! The doors below done properly with an MDF insert!

We primed with Zinsser 1-2-3 Primer to seal everything and because it bonds extremely well and provides a good base for the top coat. We then used Benjamin Moore Scuff-X in 'Natural Cream'. This decision was a tough one - Nicole had alllll of her paint swatches in the kitchen in different lights, beside different combos of hardware and counters and finally chose Natural Cream.
Scuff-X is phenomenal. I can't say enough good things about it! It goes on smooth and self levels, and then it cures twice as fast as Benjamin Moore Advance, and it's harder! Intended for commercial high traffic spaces, this is the perfect paint to make your cabinetry last! This is a case of me spending hours on end on professional painting forums and tallying up the positive and negative comments for each type of paint! Scuff-X, remarkably had 0 complaints.

Unfortunately I didn't get much photo documentation of the drawer builds as I should have, but I did get some of Nicole installing the Berenson Hardware drawer slides! The drawers were made of 7/8" maple with a 1/4" baltic birch floor.

Full depth soft-close slides were a must!

Then we added the pre-painted drawer fronts and the hardware from Rejuvenation!

The fun part was next - bringing it all together. The drawer slides went in, the drawer fronts were fastened, and then we had our final product ready for counters!
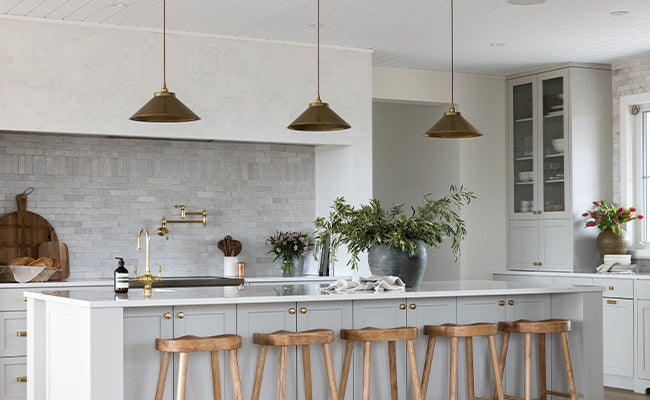
ANYWAYS! Here it is in all its' glory with Hanstone Montauk counters, and a Tudor Bridge Faucet (splurge!) from Kingston Brass. The brass in the Rejuvenation Pulls is so perfect with the Natural Cream colour!

This is my one of my proudest accomplishments to date. I've always dabbled in construction and consider myself relatively handy, but I had never built a cabinet before aside from some rough plywood ones for my workshop. The millwork for this kitchen was a test of patience that paid off in the end. We saved thousands of dollars, gained plenty of tools for future projects (the real prize here!), and can stand back and use our own work for years to come!
Consider this blog post a highlight reel. It wasn't all so seamless and systematic as I've shown you. There were plenty of struggles along the way - running out of wood, forgetting something at the hardware store, incorrect measurements, the works! But in the end, I only wasted about $50 in material and a few runs to the store - I'm happy about that!
I think that this is something that most people can do if they really want to. It requires more work up front than the build itself. I've spent 100's if not 1000's of hours over the last few years reading, studying, and watching credible YouTube channels on millwork design and construction. I've also spent a ton of time researching tools and reading reviews. My shop is a budget shop - I don't own professional grade tools, and everything is the portable version of the expensive model. This build proves that it's all possible, and I cant wait to keep the mindset rolling into our next project.... projects...okay we have a ton to do.
I hope you took something valuable from this post! Nicole and I would love to know what you think and if you have any questions! I'll be answering your comments in the reply section below.
'Til the next build!





3 comments
Beautiful! Such good job you accomplished.
I am also planning a new kitchen, the style you already have done so beautifully, and will build some own solutions as well.
Thank you for a great blog and inspiration. Loved it!
Lena
Brilliant work! I can’t wait to show my husband this write up- thanks so much!
Ali C
This turned out SO incredible and I loved following along on your Maison Blonde IG page! Your patience and meticulousness is admirable and can’t wait to see more DIY projects!! You guys make a fabulous team! Great job Brad & Nicole!
Amanda L
Leave a comment
This site is protected by hCaptcha and the hCaptcha Privacy Policy and Terms of Service apply.